Transferring voice memos from your iPhone/iPad to your PC or Android can seem challenging, but with the right methods, that I write in this post, it is really easy.
In this blog post, I will show you 4 ways to Transfer Voice Memos from iPhone/iPad to PC/Android.
1). Using iCloud to Transfer Voice Memos
To efficiently transfer voice memos from your iPhone or iPad to your Windows PC or Laptop using iCloud, follow these streamlined steps:
Step-by-Step Instructions
Save Voice Memos to iCloud Drive
- Launch Voice Memos app on your iPad or iPhone.
- Select the memo you wish to transfer, tap the “…” button, and choose “Share”
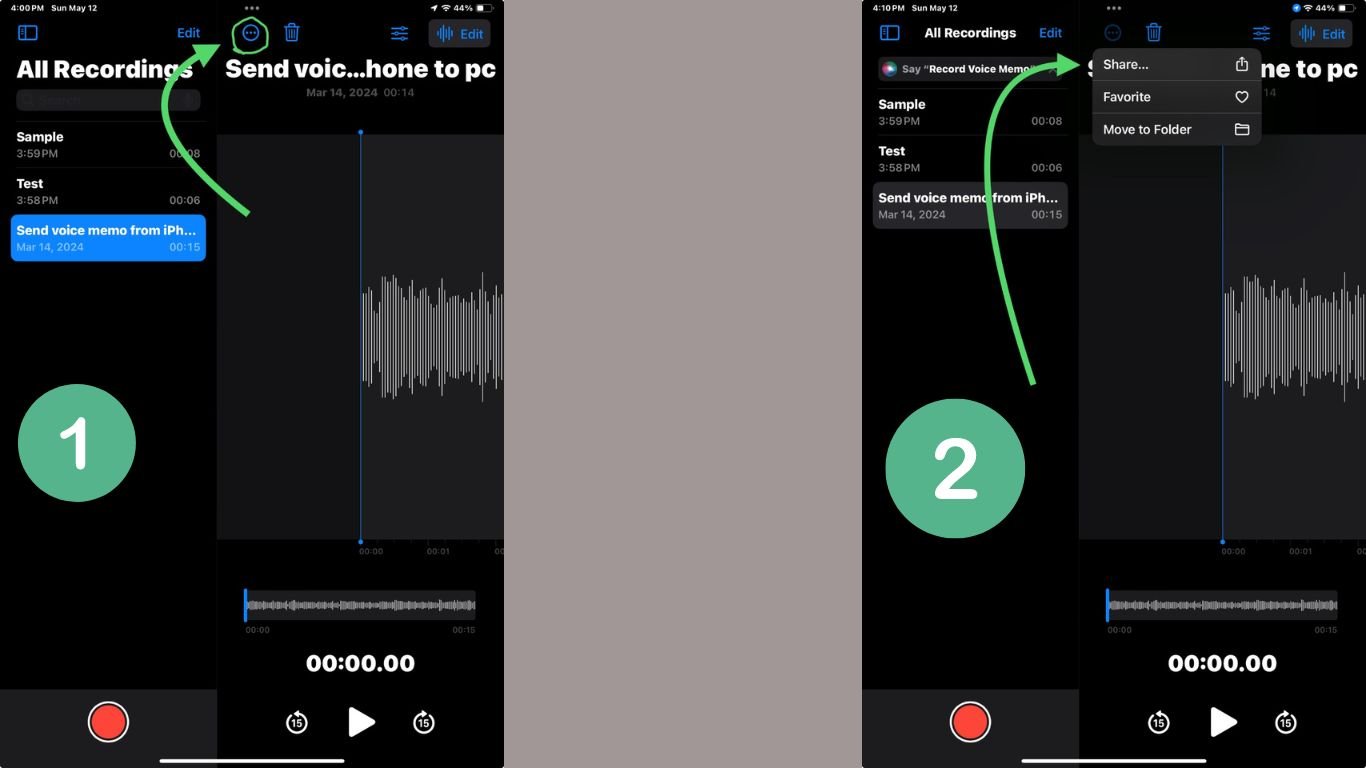
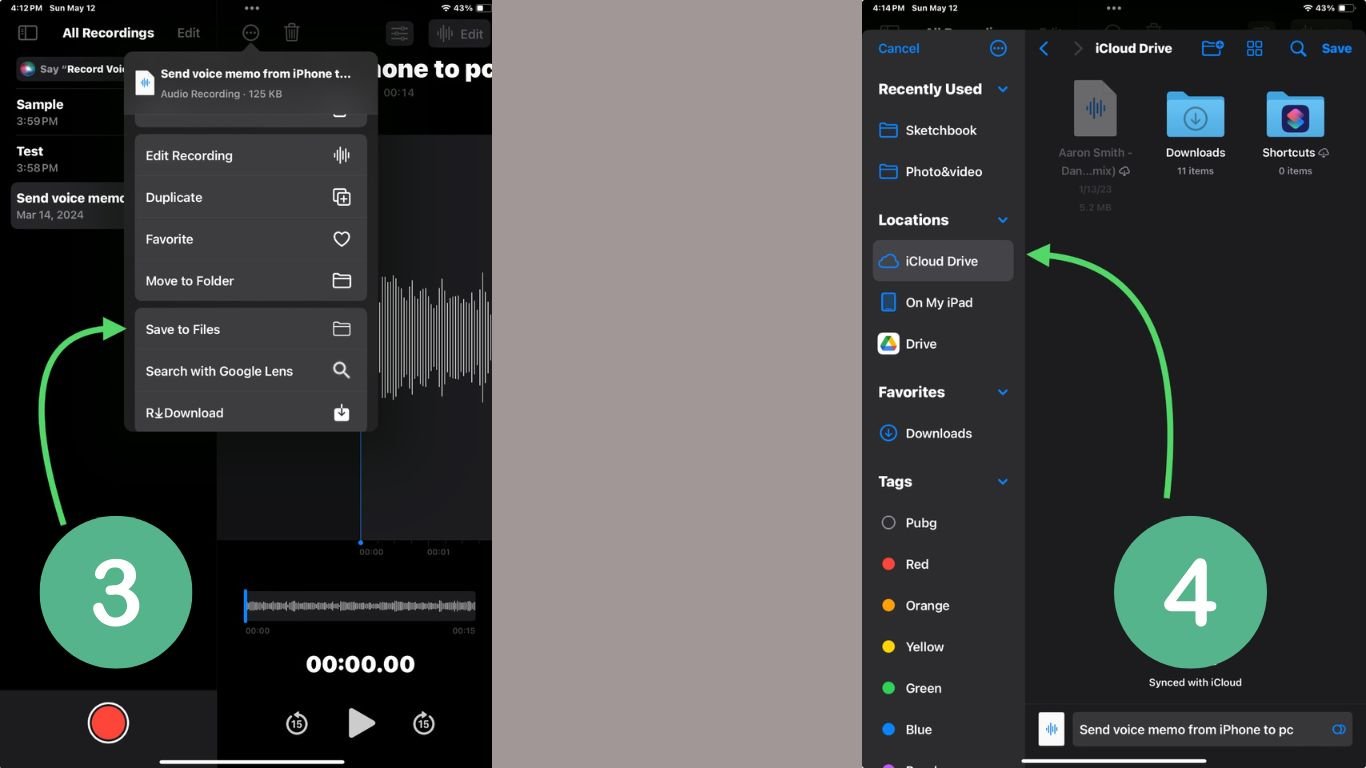
- In the share section. Choose “Save to Files”
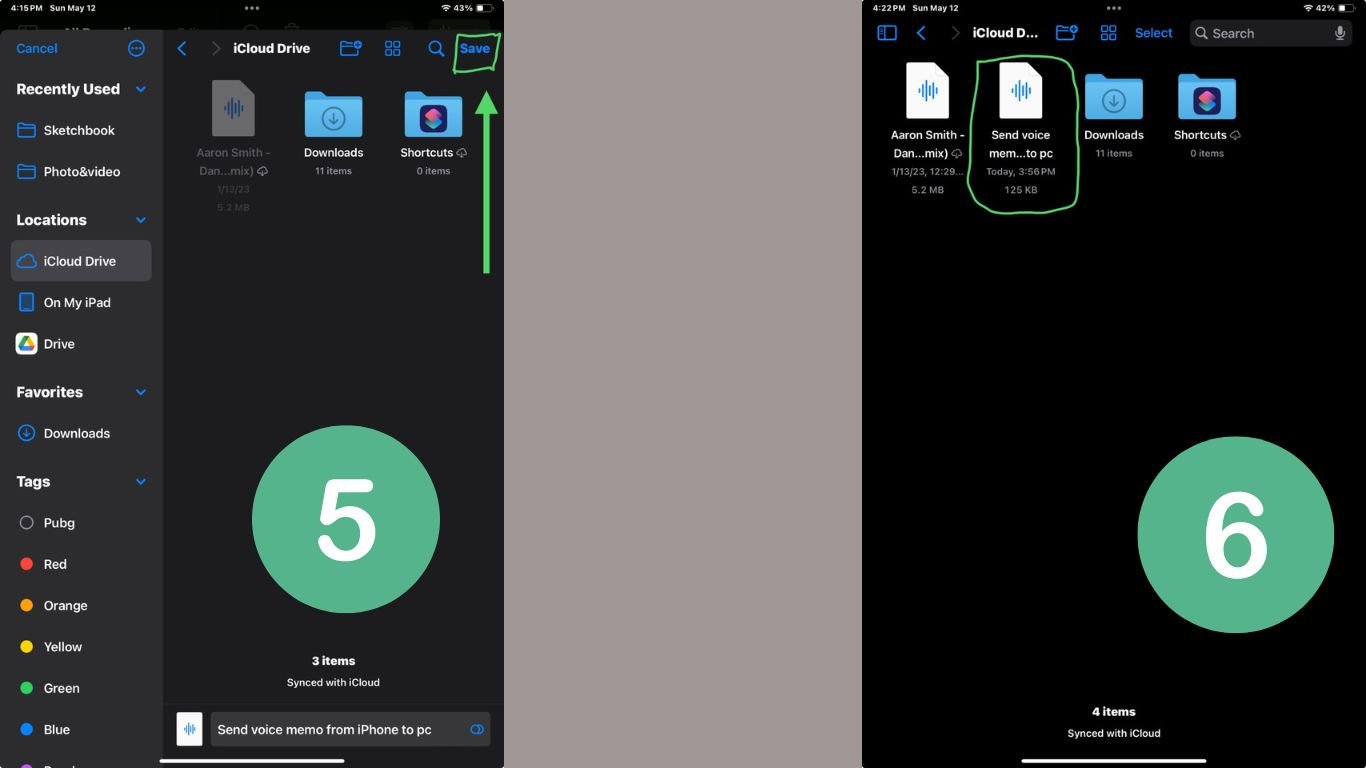
- Select iCloud Drive to save your voice memo.
Access I cloud drive on Your PC
- On your PC, navigate to iCloud for Windows. Download it from the Microsoft Store If not installed yet.
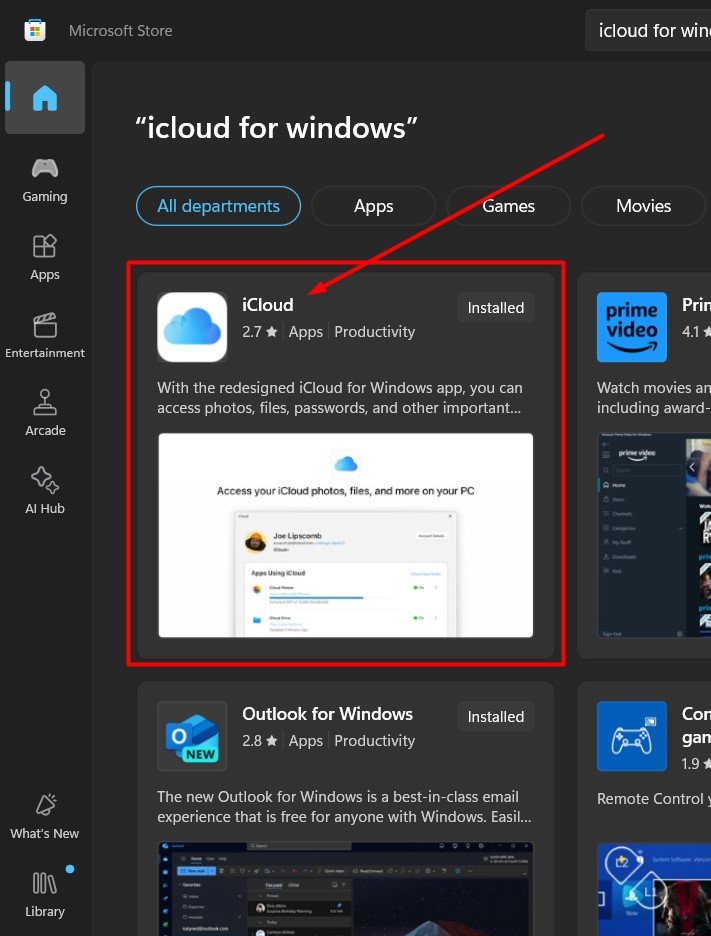
- Sign in with your Apple ID and access the iCloud Drive folder.
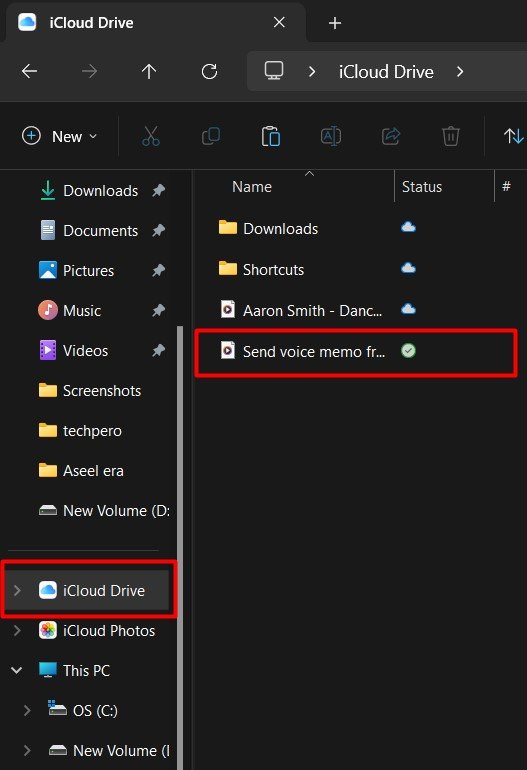
- After this Open “File Explorer” or “This PC”
- Locate the ‘Voice Memos’ where you save it.
Troubleshooting/Common Mistakes
- Syncing Issues: If you do not see your voice memos in iCloud, ensure that both your iPhone and PC are connected to the internet and that iCloud Drive is enabled on both devices.
- Visibility in iCloud: Sometimes, files take a few minutes to appear due to syncing delays. Refresh your iCloud Drive or sign out and back into your iCloud account.
2). Emailing Voice Memos to Yourself
Step-by-Step Instructions
Open the Voice Memos App
- Launch the Voice Memos app on your iPhone/iPad.
- Select the recording you wish to transfer.
Send Via Email
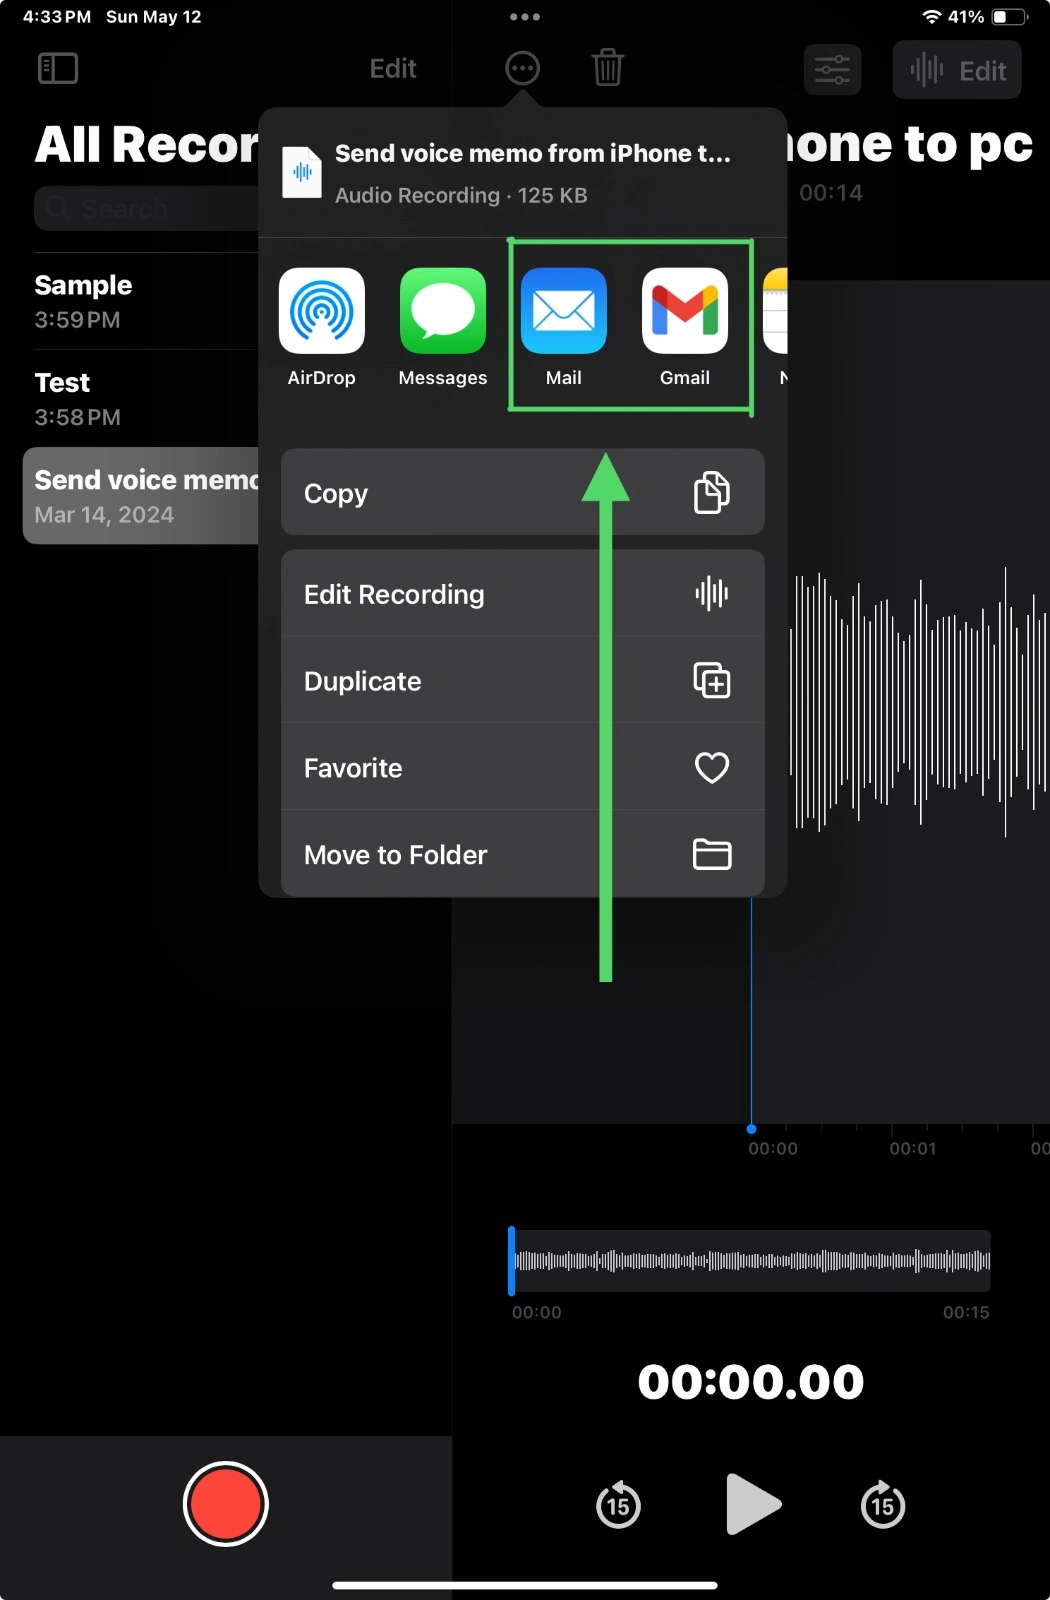
- Tap the share button, then choose ‘Mail’.
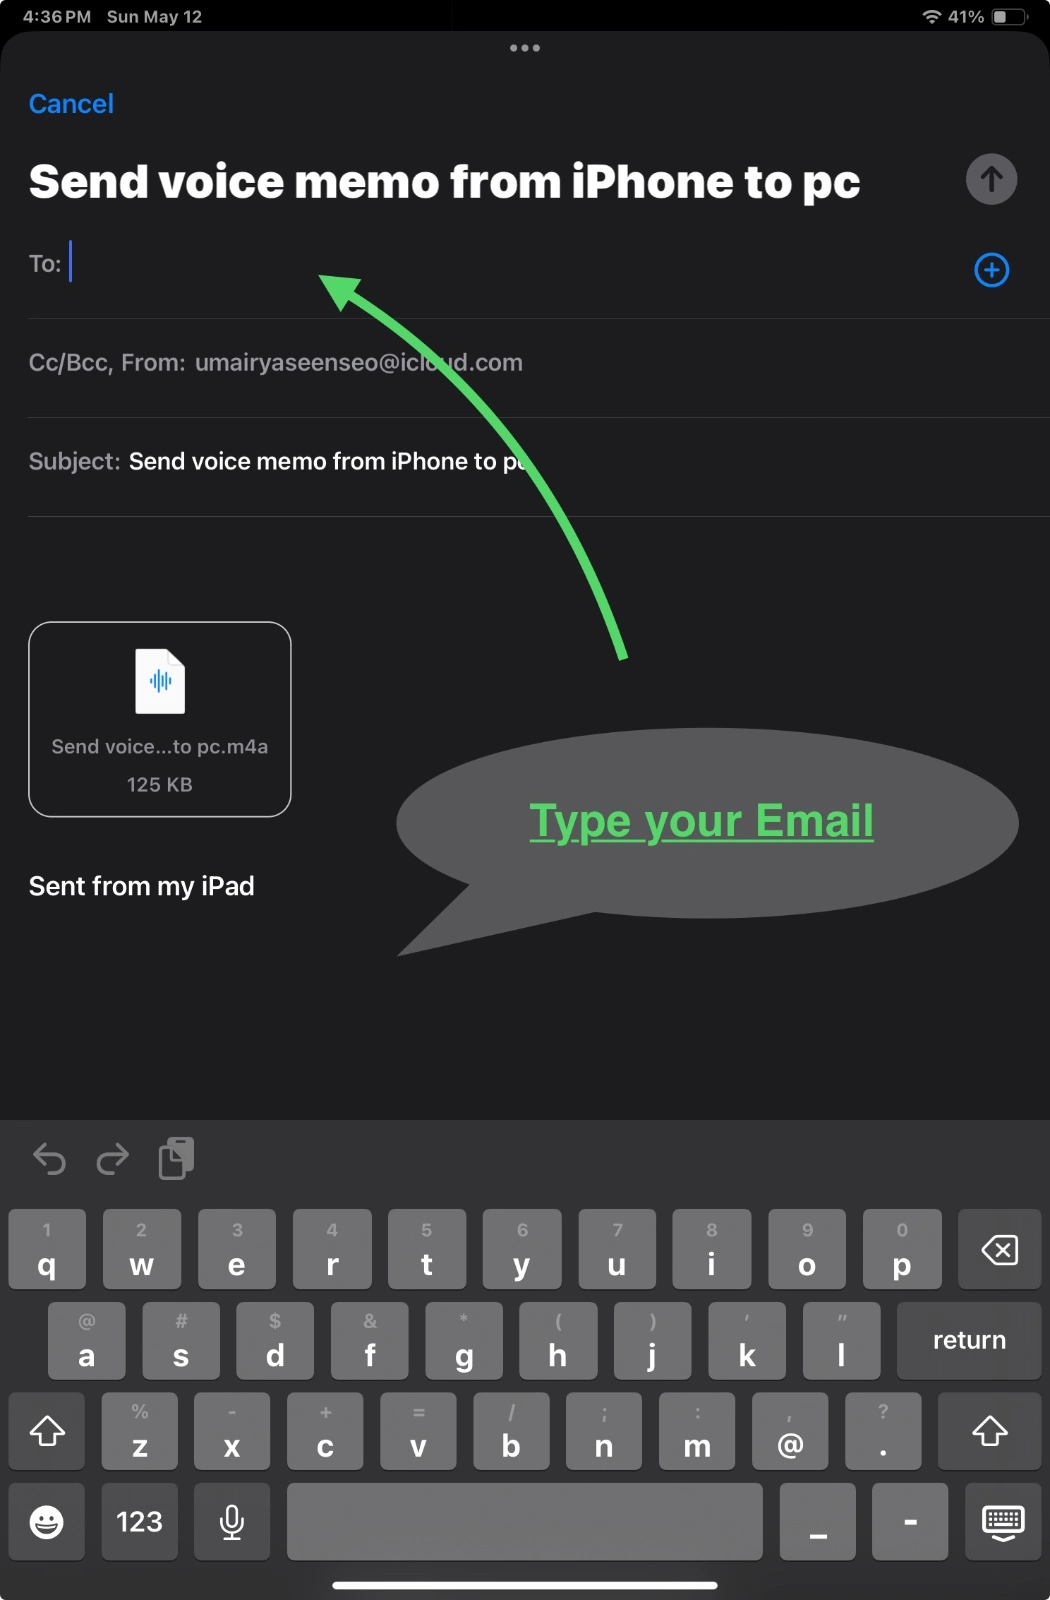
- Enter your email address and send the memo to yourself.
3). Utilizing Cloud Storage Services like Google Drive
Step-by-Step Instructions
Install Google Drive on Your iPhone
- Download the Google Drive app from the App Store if it is not already installed.
- Open the app and log in with your Google account.
Save the Voice Memo to Google Drive
- Open the Voice Memos app.
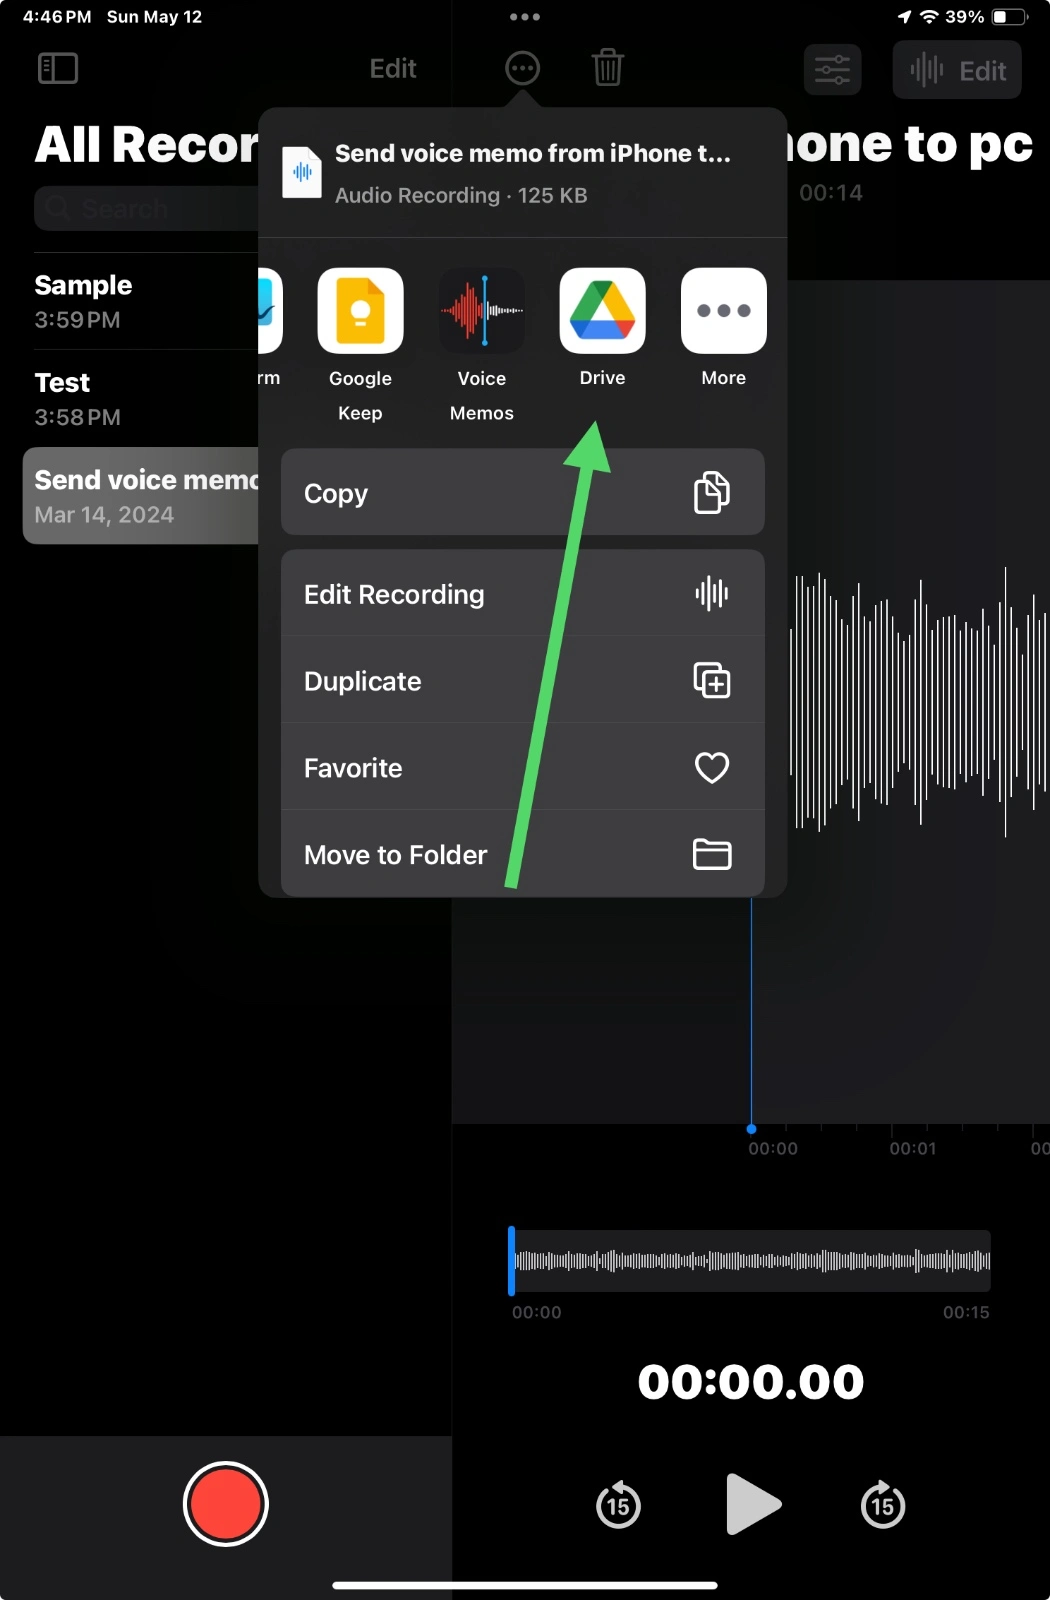
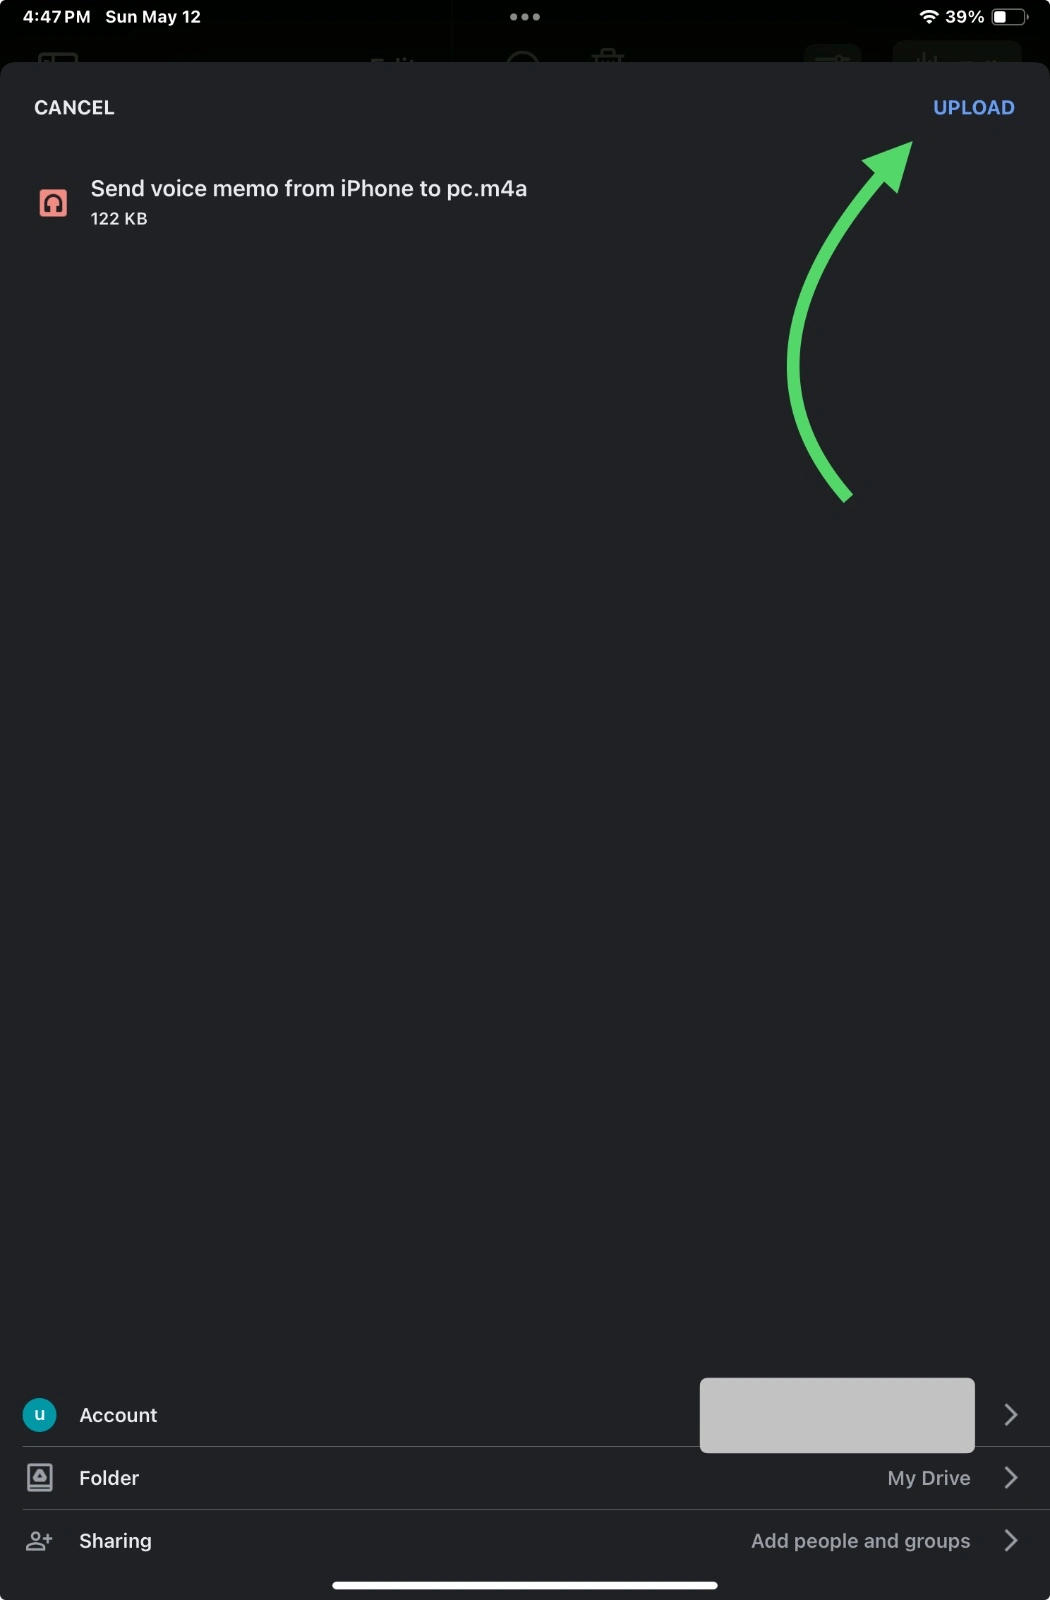
- Select the memo you want to transfer, tap the “Share” icon, and then choose Google Drive Icon.
Access and Download the Voice Memo on Your PC
- On your PC, open any web browser and navigate to Google Drive.
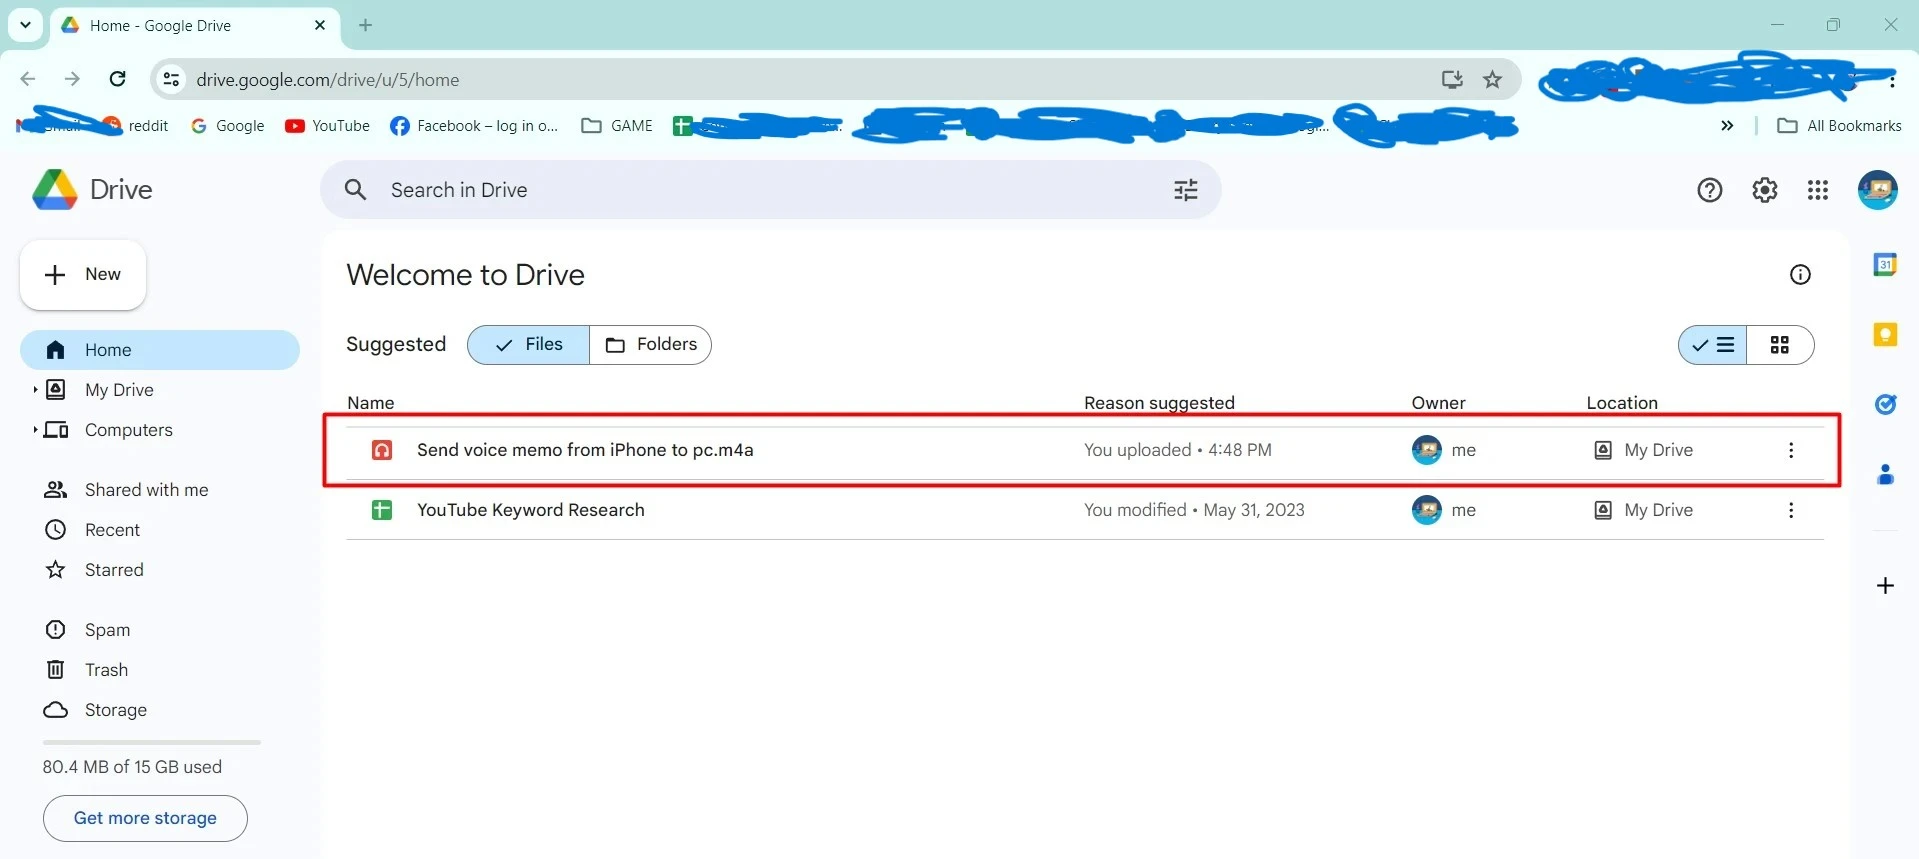
- Log in with the same Google account used on your iPhone.
- Locate the voice memo file, and select ‘Download’ to save it to your PC.
Tips and Tricks
- Organizing Multiple Memos: If transferring multiple voice memos, consider creating a dedicated folder in Google Drive to keep them organized.
- Large Files Handling: For larger voice memo files, ensure your Google Drive has enough space to save them.
Troubleshooting/Common Mistakes
- Syncing Delays: If the voice memo does not immediately appear in Google Drive, give it a few minutes as there might be a syncing delay.
4). Transferring through Messaging Apps
Step-by-Step Instructions
Share Voice Memos Using Messaging Apps
- Open the Memos app on your iPhone or Ipad.
- Select the memo you want to share.
- Tap the share icon and choose a messaging app like WhatsApp.
- Select the contact to whom you want to send the memo.
Receive and Download Voice Memos on PC
- Open WhatsApp on your PC.
- Download the voice memo directly from the chat.
Tips and Tricks
- Multiple Voice Memos: To share multiple voice memos at once, tap “Edit” in the Voice Memos app, select the memos you want to share, tap the share icon, and choose your preferred messaging app.
Troubleshooting/Common Mistakes
- File Size Limitations: Some messaging apps have limits on the file size you can send.
- Network Connectivity: Ensure both the sender and receiver have stable internet connections to avoid interruptions during the file transfer.
Conclusion
Throughout this article, we’ve explored a multitude of methods to transfer voice memos from an iPhone to a PC, ensuring that for every technical preference or requirement, there’s a viable solution.
From using iCloud, and emailing memos directly, to employing various cloud storage services like Google Drive, we’ve covered a comprehensive guide to help safeguard your valuable voice recordings.
